| LX5550
Tutorial
For
troubleshooting tips, please refer to the main page troubleshooting
link.
Installing
the Drivers - Straight through USB Cable:
- Purchase a USB cable if you haven't already. Get one (and other
cool stuff) here from eCity
Wireless!
- Driver installation can be tricky. It's very important that you
do not hook up the cable and phone to the computers USB port until
after you've installed the correct software driver in the next step.
- Run the LGUSBModemDriver_Eng_Ver_4.1.exe
in the root directory of the Super CD.
- Hook up cable and phone to a USB port on your computer (phone
must be on)
- TheWindows New Hardware Wizard will start.
- If the wizard does not start did it ever start? meaning, if this
isn't the first time you've hooked up the cable, the wizard may
have ran and installed the driver already. If this is the case,
the wizard won't run again.
- Normal operation. This is what you should see when installing
the drivers.
- The first window asks if you want to connect to windows update
to search for a driver.
Choose "no, not at this time" and click Next.
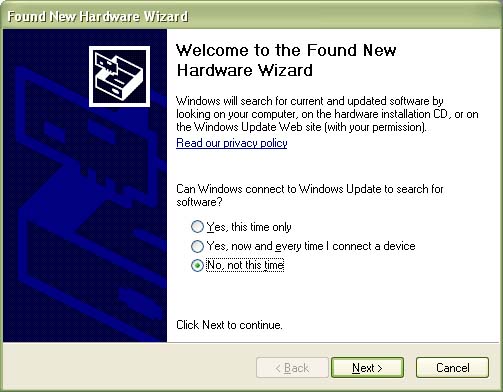
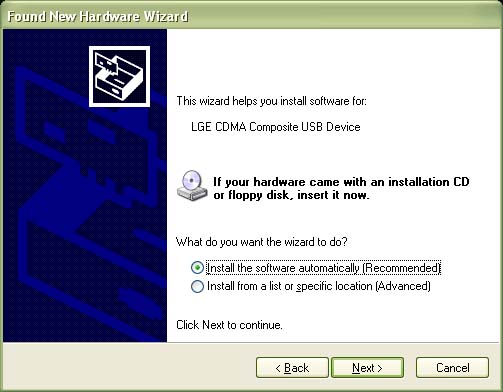
- The next Window will show that it's helping to install for a particular
device. Depending on the model phone you have, the actual device
listed may vary. Choose to Install the software automatically and
click Next.
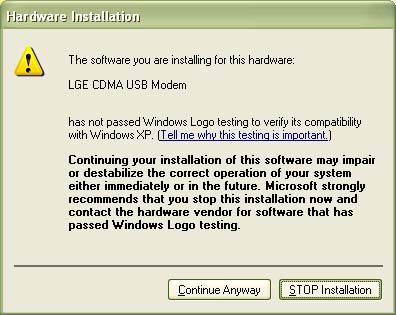
- You may receive the following message regarding windows logo testing,
ignore and and click "Continue Anyway."
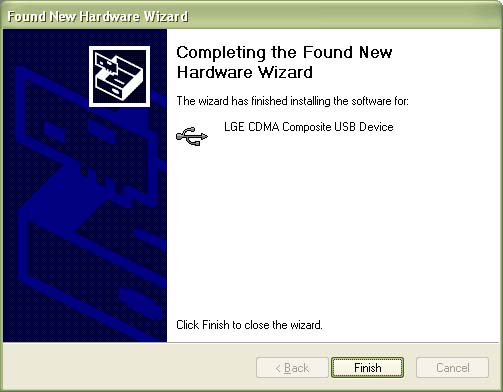
- The next screen shows that the wizard has completed. Click Finish.
- After you've completed that, depending on the model phone you
have, the wizard may start up all over again automatically. This
is normal. Just answer each prompt the same as above.The Wizard
may run 3 times and install each of the following devices:
- LGE CDMA Composite USB Device
- LGE CDMA USB Modem
- LGE CDMA USB Serial Port
- Once the Wizard doesn't run anymore, the drivers have installed
successfully.
Determining
the Port - Straight through USB Cable:
Many people that request
support for this always skip this step. For any program to talk to your
phone, the program will need to know what COM Port is assignned to the
phone device in Device Manager.
- Right Click your My Computer
Icon, select Manage
- Click on Device Manager
on the left
- On the right, click the
+ sign next to modems (you should see your phone listed there)
- Right click on your phone
and select properties
- Click advanced
- Click Advanced Port Settings
- You will see the COM Port
setting at the bottom (write it down, you will need it later)
BITPIM:
Cable Method:
BITPIM:
Please Backup your
phone!
- Load Bitpim, click edit,
settings, choose your phone model and appropriate com port.
- Go to View (in menu)
in BitPim and make sure "View filesystem" is checked
- Click the filesystem tab
and click the plus sign. You should see the directory structure of
your phone.
- Go to Data (in menu)
and "Get Data"
- Check all four boxes (PhoneBook,
Calendar, Wallpaper, Ringers), hit ok
- Goto "Filesystem"
Tab
- Right click at the top
of the tree (the first/highest +)
- Click on "Backup
Entire Tree." Let it finish.
- This will save a ZIP of
the phone's EFS.
*remember to always plug the phone in before loading Bitpim.
- This will also download
your phone pictures.
How
to create & load wallpapers with Bitpim:
Adding
Wallpapers:
- Find the pictures on
the cd that you want to put on your phone.
- Change the name if it
has CAPITAL letters to lowercase (keep it short)
- Save it directly to the
"wallpaper" folder under "bitpim"
- This way it will be there
when you go to launch bitpim
- Hook up your phone
- Run bitpim
- Click on the"wallpaper"
tab to ensure that the image is there if not click add and add it.
- Select "data"
from the top toolbar
- Select "send phone
data"
- A pop-up box appears with
several options to send.
- Select "wallpaper"
by clicking the box to the left of it.
- Select "add/merge"
to add the current files to your phone.
Note: Selecting
"add/merge" adds the files without overwriting what you
presently have on the phone. If you select "replace/overwrite"
all of the files you are about to load will overwrite what you currently
have on the phone. It is always recommended to "add" your
files.
- Bitpim will say "busy"
and a status bar will run at the bottom showing the current files
being loaded.
- Powercycle your phone
to get the files to show up.
Adding
Ringtones:
- Find a ringtone or midi
file ending in .mid on the cd.
- Copy and paste it to
your system under the subfolder "ringers" in the "bitpim"
folder
- Run bitpim
- Select "data"
from the top toolbar
- Select "send phone
data"
- A pop-up will appear
asking what data you want to send to the phone
- Well, for this we will
select "ringtones" by clicking the box to the left of it
- Select "add/merge"
to add the current files to your phone
Note: Selecting "add/merge"
adds the files without overwriting what you presently have on the
phone. If you select "replace/overwrite" all of the files
you are about to load will overwrite what you currently have on the
phone. It is always recommended to "add/merge" your files.
- Bitpim will say "busy"
and a status bar will run at the bottom showing the current files
being loaded.
- Save and quit
- Powercycle your phone
to get the files to show up
How
to create and load QCP and/or MP3 ringers
For advanced users, read thru this before you begin (See also Mp3_1.htm
and mp3_2.htm for different instructions)
Install the following programs from the Super CD
- Qualcomm's purevoice
- QCP player
- SoundForge
QCP
Quality: Poor
(mono, 8 kHz, 16-bit)
QCP files are qualcom purevoice files. In order to get another wave
form sound file to QCP you'll need to conform to QCP standards of PCM,
mono, 8 kHz, 16-bit wave file.
MP3
Quality: Excellent
(any bitrate is fine)
If you don't know what an MP3 is by now you've been in a deep slumber.
Well, wake up. It's the most popular music file out there. I use the
SoulSeek P2P to get MP3s; it's excellent.
- Open Sound Forge
- Get the sound/file you
want (via loading an MP3 or recording)
- Choose a clip to use as
a ringer
- Highlight it and crop
it (edit=>trim/crop)
- FOR MP3s: Save as an
MP3; goto Step 8. For QCPs continue.
- Change the sample rate
to 8kHz (process=>resample)
- Save as a 16-bit mono
wav
Use a short one word name(file=>save as...) to where you installed/uncompressed
the WAV to QCP converter
- Go to a windows command
prompt "Start Menu, Run, cmd"
- navigate to the directory
where you saved the wav file to where the wav to qcp converter is
C:\>cd \QUALCOMM PureVoice\PureVoice
converter\
C:\QUALCOMM PureVoice\PureVoice
converter>dir
Volume in drive C has no label.
Volume Serial Number is B448-2C92
Directory of C:\QUALCOMM
PureVoice\PureVoice converter
09/11/2003 01:14 PM DIR .
09/11/2003 01:14 PM DIR ..
09/08/2003 03:56 PM 1,411 command.lnk
09/11/2003 01:08 PM 62,172 hive.wav
08/07/1998 04:54 PM 4,989 PVConv Readme.txt
08/06/1998 11:54 AM 172,032 PVConv.exe
06/03/1998 05:35 PM 3,470 PVsample.qcp
09/08/2003 03:57 PM 44,208 pvsample.wav
09/09/2003 03:39 AM DIR tests
6 File(s) 288,282 bytes
3 Dir(s) 3,023,994,880 bytes free
C:\QUALCOMM PureVoice\PureVoice
converter>
For this example I'm using "hive.wav"
- Type "pvconv hive.wav
hive.qcp", hit enter
C:\lg vx6000 hacking\QUALCOMM
PureVoice\PureVoice converter>pvconv hive.wav hive
.qcp
C:\lg vx6000 hacking\QUALCOMM
PureVoice\PureVoice converter>dir
Volume in drive C has no label.
Volume Serial Number is B448-2C92
Directory of C:\QUALCOMM
PureVoice\PureVoice converter
09/11/2003 01:23 PM DIR .
09/11/2003 01:23 PM DIR ..
09/08/2003 03:56 PM 1,411 command.lnk
09/11/2003 01:23 PM 4,620 hive.qcp
09/11/2003 01:08 PM 62,172 hive.wav
08/07/1998 04:54 PM 4,989 PVConv Readme.txt
08/06/1998 11:54 AM 172,032 PVConv.exe
06/03/1998 05:35 PM 3,470 PVsample.qcp
09/08/2003 03:57 PM 44,208 pvsample.wav
09/09/2003 03:39 AM DIR tests
7 File(s) 292,902 bytes
3 Dir(s) 3,023,839,232 bytes free
C:\QUALCOMM PureVoice\PureVoice
converter>
Notice that hive.qcp exists.
- Close to command prompt
(type exit, hit enter)
- To test: run the PureVoice
player and load the QCP.
- Rename the QCP/MP3 file
to all numbers(I'll rename hive.qcp to 123.qcp or hive.mp3 to 123.mp3)
- Open Bitpim
- Click on the "Ringers"
tab
- Right click in the whitespace
(not on a file), click "Add," find file, click ok Goto
"Data" (on filemenu)
- Click "Send Phone
Data"
- Check "Ringers,"
choose either "add" or "replace"
- Hit OK
- On phone: Left soft key
(for Menu), "7" (My Media), "2" (Music),
- Highlight new ringer,
left soft key (Set As), choose your setting.
How
to use the Wireless Internet with Verizon:
I assume that you have gotten
your phone recognized as a device when you hook it up to your computer.
These instructions rely on you to be a little more independant than
other tutorials.
Anything I say about Broadband (as far as instructions go) is complete
speculation.
- Installing your VX6000
as a modem in Windows XP:
- Load the drivers if you
haven't already see top of this page. Express Network is recommended
here.
- Configuring the phone
to work with QuickNetConnect/Quick2Net, Express Network/National Access,
or Broadband
- Make sure that your phone
is attached
- Go to your phone in device
manager
- Click on "Properties"
- Click on the "Advanced"
tab
This is what's called an initialization string. The initialization
string needs to match what's stated below for that specific option
to work... (if you try to use the QNC initialization string with EN,
it won't work)
For QuickNetConnect/Quick2Net(QNC):
AT$QCMDR=2
For Express Network/National Access(EN):
AT$QCMDR=3
I assume this is the initialization string for Broadband:
AT$QCMDR=4
Creating
Dialup Connections with the Connection Wizard:
This is an alternative to using the Verizon Dialer
- Open Control Panel>Network
Connections>"File" menu>"New Connection"
- Click "Next"
- Click "Set up my
connection manually" radial button, click "Next"
- Make sure "Connect
using a dial-up modem" is selected, click "Next"
- Under "ISP Name"
write either "QNC", "EN" or "Broadband"
- Set the phone number to
#777 (for any of the three)
- Next you need to enter
a username...
QNC...
username: vzw
password: vzw
EN...
username: (xxx)xxx-xxxx@vzw3g.com (replace (xxx)xxx-xxxx with your
phone number)
password: vzw
- Click "Next"
- Click "Finished"
Speeds,
Charges, and other unanswered questions:
What
are the speed difference between the three wireless internet options?
QNC: 14.4 kb/s, capped
EN: 40-60 kb/s, as if you haven't heard WITH BURSTS
UP TO 144kb/s
Broadband: 300-500 kb/s, only available in San Diego
& Washington D.C.
What are the charges for each options?
QNC: MOU* with every single Verizon Wireless account.
No other charges apply. *MOU: Minutes of usage, like making a phone
call
EN: .60/min; or $79.99 for unlimited usage/month. If
you still have a copy of the contract you signed/look at your monthly
bill under "Promotions and Other Credits." If you see something
that reads "EN MOU n/c," then you're lucky. That's right,
that translates out to "Express Network, Minutes of Usage, No Charge."
You can use EN for MOU. I did do a test two nights ago by staying on
for five minutes. Now I'm just waiting for my bill.
Broadband: $79.99/month
Remember to call the Tech Department at 1-800-308-DATA with any questions,
or to add any provisions to your account.
How
to set up a WAP proxy & How to set the proxy IP in your phone:
Stuff you'll need:
Sign up & set up a homepage
at TagTag.com
If you search in Yahoo! for WAP directories, you'll find quite a few
good sites. Here's a thread in Howard Forums.
Make sure you know what your site is when you're done. (ex: http://www.tagtag.com/bigflavors-page/)
Install the InfoKomp WAP Gateway from cd
Set it to run as a system service(starts on Windows load)
Get your ip
note that this is not for people running a firewall or a router. you'll
need to figure all that out on your own.
In Windows: run>cmd then type ipconfig and hit enter. Your IP address
is the number next to IP address(ex. 192.168.0.101). :)
- In your phone:
- menu>0>(on Verizon:
000000) or (on USCC: [find what it is by viewing the file nvm/nvm/nvm_0000
in a hex editor. Look on the second line, it'll be 6-digits."*)>9("wap
settings")>1("ip settings")>4("link2-ip1")
*taken from RogerBinns VX4400 FAQ
- enter your ip here
- hit "ok"
- hit "clear"
to go back to "wap setting"
- hit 2
- hit 4
- type in 9201
- hit "ok"
- hit "end"
- start your browser (let
it do it's thing)
- hold the 0 key down for
about 3 seconds
- hit 6("advanced...")
- hit 3("set wap proxy")
- hit 2("wap proxy
2")
- back to "advanced"
- hit 2("homepage")
- hit "ok" to
go through the warning
- enter in your tagtag home
page (ex: http://tagtag.com/bigflavors-page/)
- hit "ok"
|
Get more great deals
from
eCity Wireless
Antenna Booster
Car and home
chargers
Bluetooth
Devices
Memory
Cards
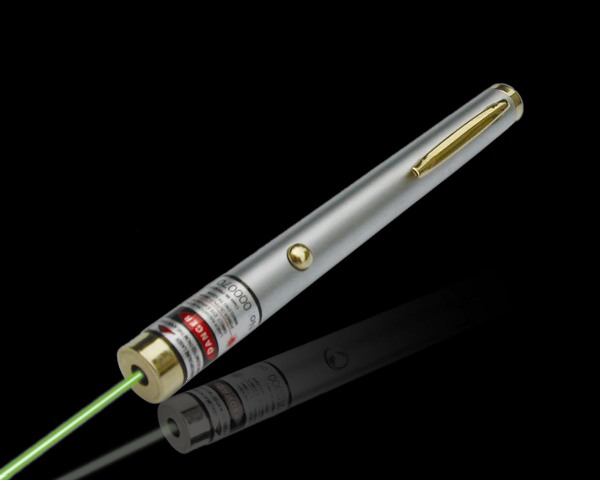
POWERFUL
Green Laser Pointer see the beam not just the dot at the end!
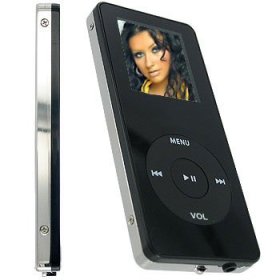
MP3/MP4
Players with FM, Games, video, etc.

Accessories
for your Harley
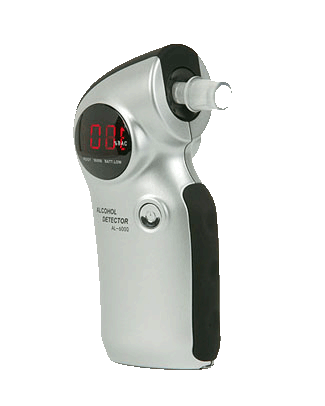
Digital
Breathalyzers
|


